
Set up TikTok Pixel and Events API
This guide shows how to connect your TikTok Pixel to your store using the app. The app sends events from the customer’s browser (Pixel) and from the server (Events API), so they still reach TikTok when an ad blocker stops the Pixel.
Steps to enable
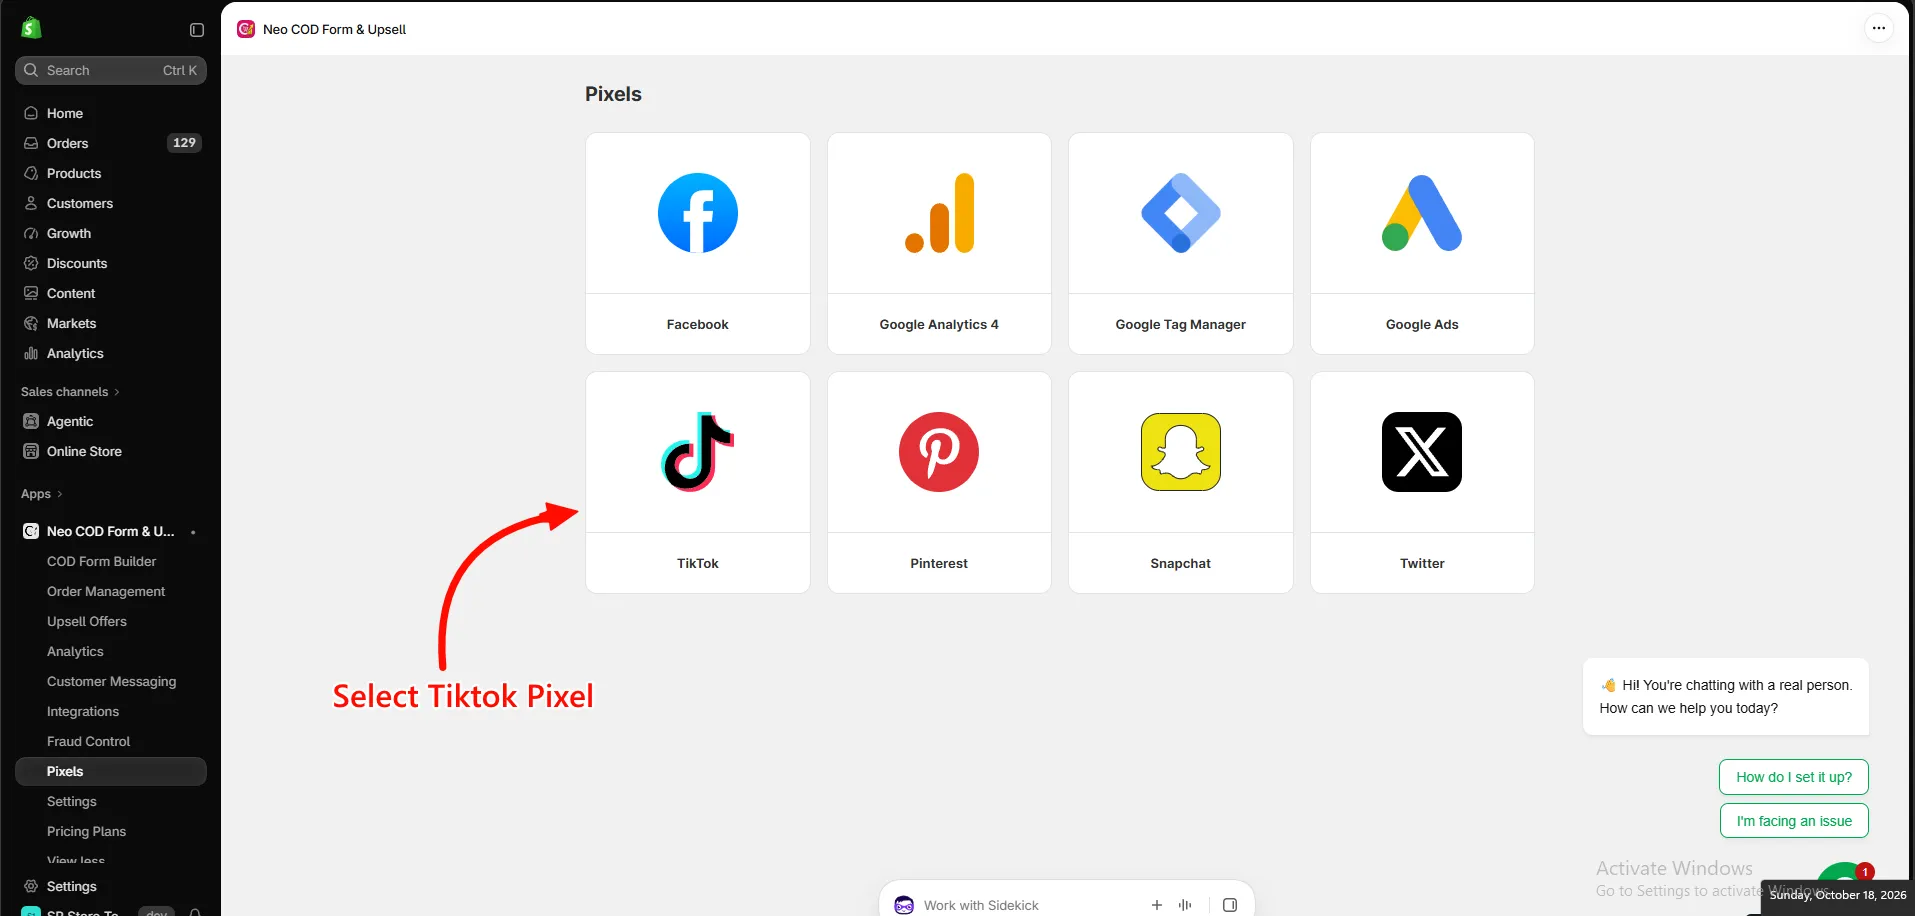
Section titled “Steps to enable”Step 1: Open the app and go to Pixels from the side menu, then select TikTok.
Step 2: Under Pixel Settings, paste your Pixel ID and Access Token.
Step 3: Go to the Events tab and turn on the events you want to track:
- Search
- Product Page View
- Add to Cart
- Initiate Checkout
- Purchase
Step 4: Click Save, then make sure the pixel’s switch is turned on in the Pixels list.
Find your Pixel ID and access token
Section titled “Find your Pixel ID and access token”Pixel ID
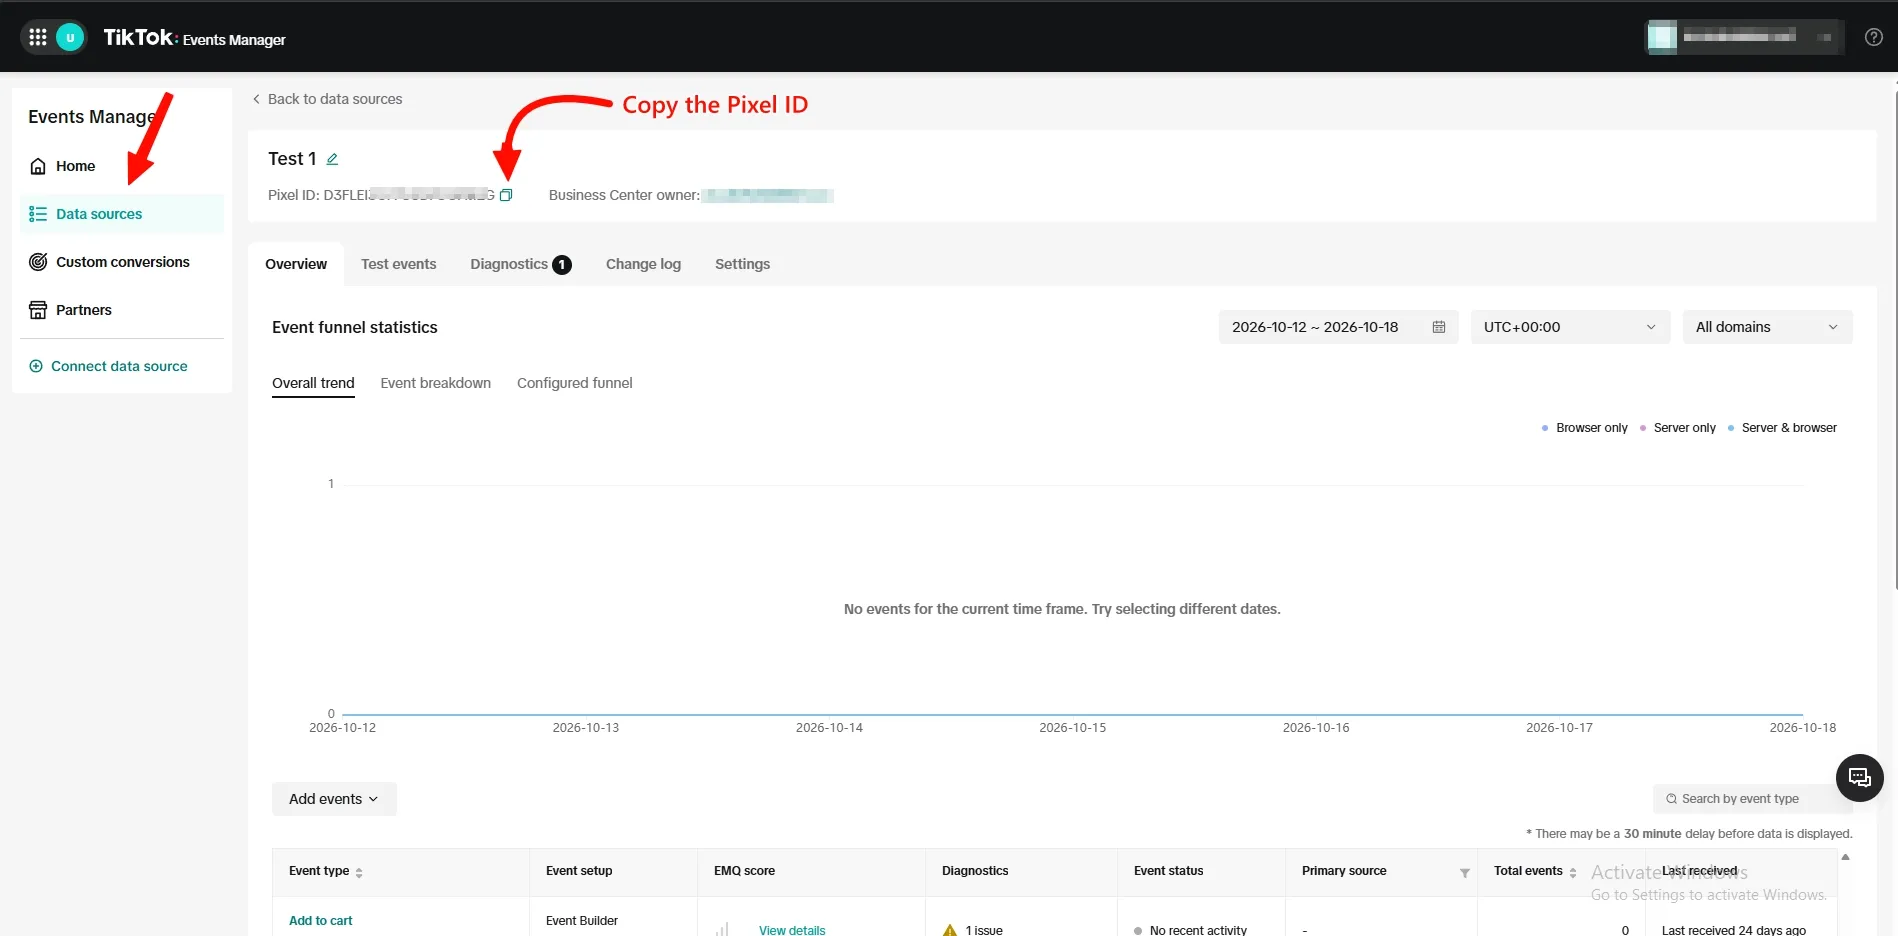
Section titled “Pixel ID”Step 1: Log in to TikTok Events Manager.
Step 2: Click Data sources in the left menu and open your pixel.
Step 3: Click the copy icon next to Pixel ID at the top of the page.
Access token
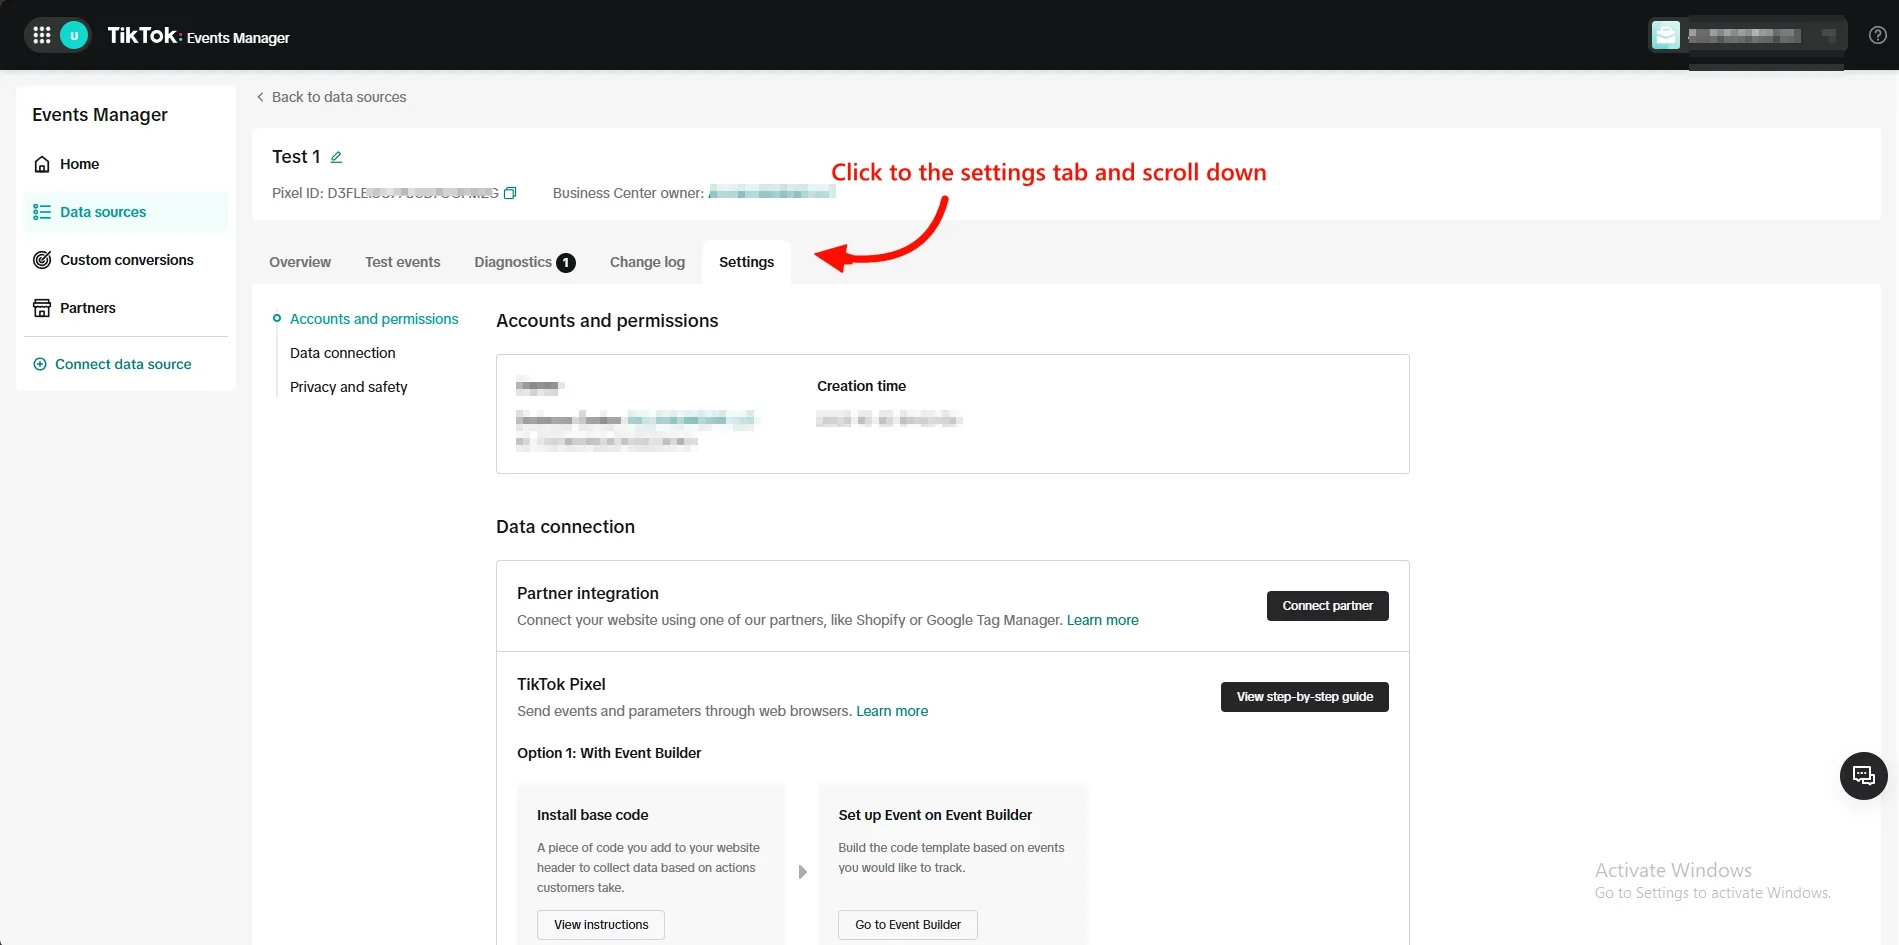
Section titled “Access token”Step 1: On the same pixel page, open the Settings tab and scroll down.
Step 2: Under Events API, click Generate access token.
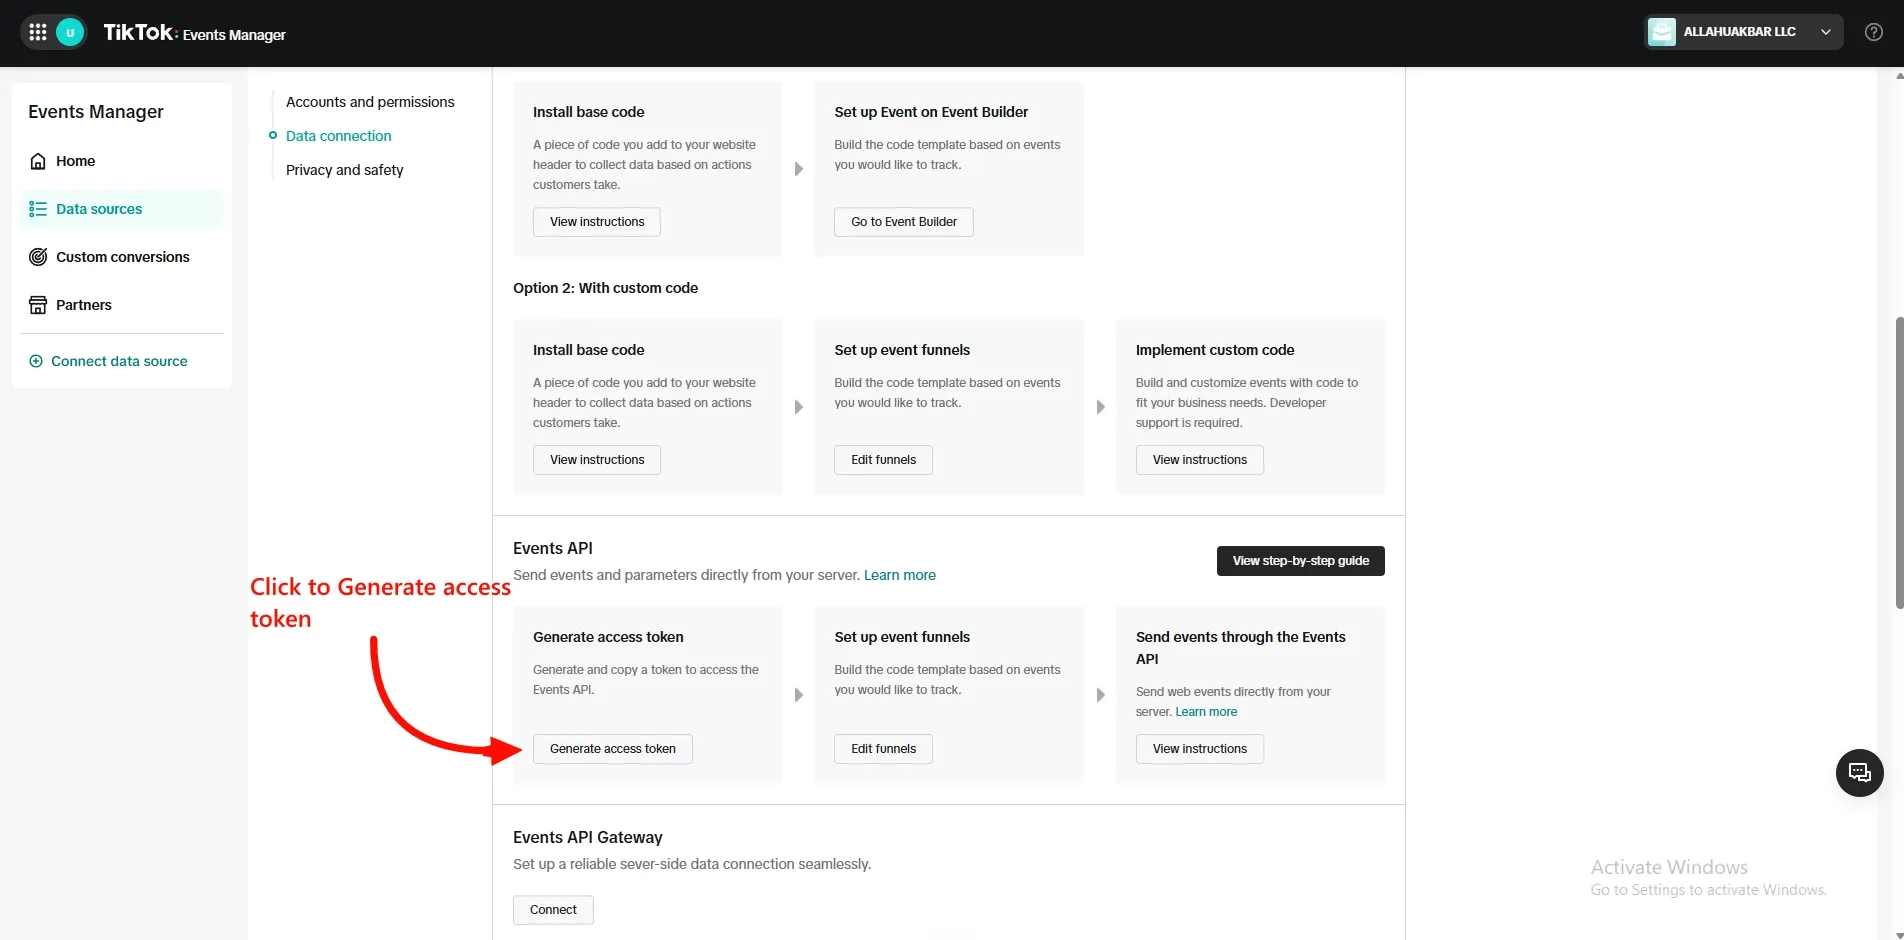
Step 3: Copy the token.
- Pixel ID and Access Token are both required to save the pixel.
- The Purchase event needs at least one purchase type turned on, or saving will show an error.
- To check that server events arrive, turn on Test Server-side Events and paste the test event code from the Test events tab in TikTok Events Manager. Remove the code once you are done testing.
- You can turn the pixel on or off anytime from the Pixels list without losing your settings.
Related
Section titled “Related”- What are Meta Pixel and CAPI? — the same browser-plus-server idea, explained
- Set up Google Analytics 4