
Connect Carrybee Courier
Once Carrybee is connected, you can send orders to Carrybee as parcels straight from the app, and their delivery status updates on its own as the parcel moves.
The setup has two parts:
- Carrybee to the app: copy your Client ID, Client Secret, and Client Context from Carrybee and paste them into the app.
- The app to Carrybee: copy the Webhook URL and Webhook Secret from the app and paste them into Carrybee’s webhook settings.
You’ll need a Carrybee merchant account. If you don’t have one yet, click Register Now on the Carrybee login page first.
Open the Carrybee settings in the app
Section titled “Open the Carrybee settings in the app”Step 1: In the app, go to Order Management and open the Courier Integration tab.
Step 2: Find Cary Bee and click Configure.
You’ll land on the Configuration page. Leave it open. The API Configuration section is where your Carrybee credentials go, and the Webhook Configuration section has the values you’ll paste into Carrybee later.
Part 1: Get your Client ID, Client Secret, and Client Context
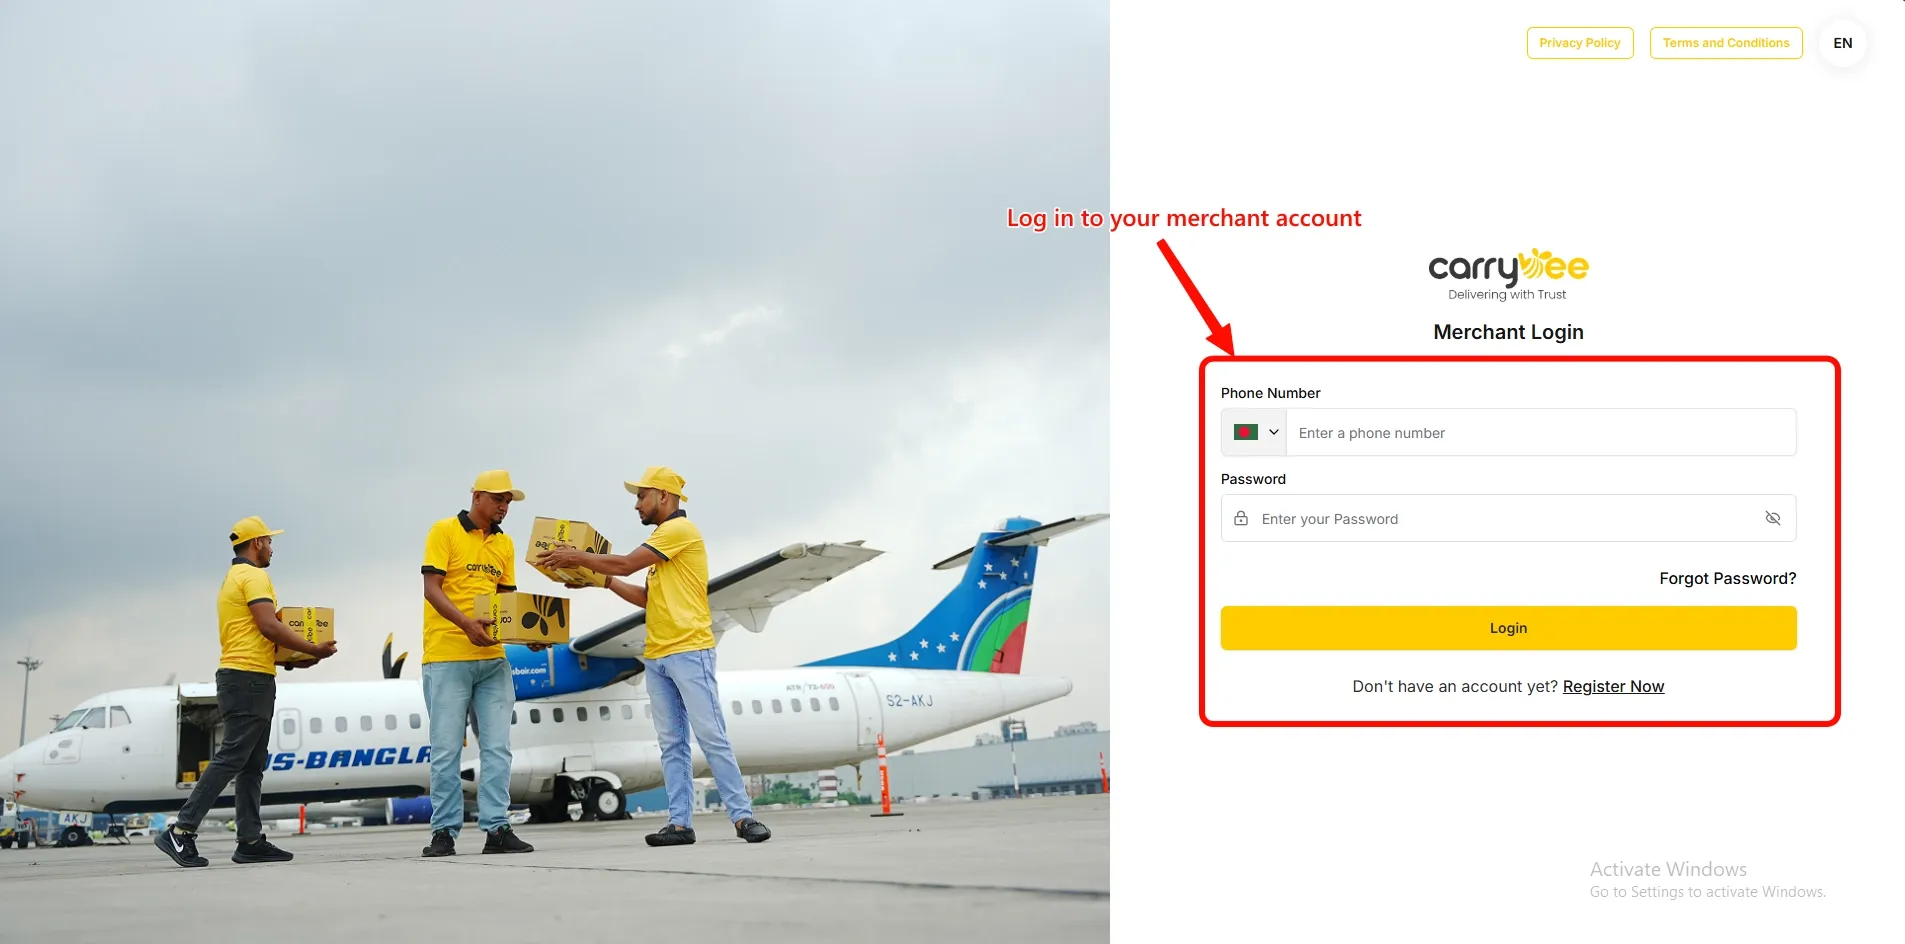
Section titled “Part 1: Get your Client ID, Client Secret, and Client Context”Step 1: Go to the Carrybee login page and log in with your phone number and password.
Step 2: On your Carrybee dashboard, click your store name in the top right corner to open the menu, then click API Integration.
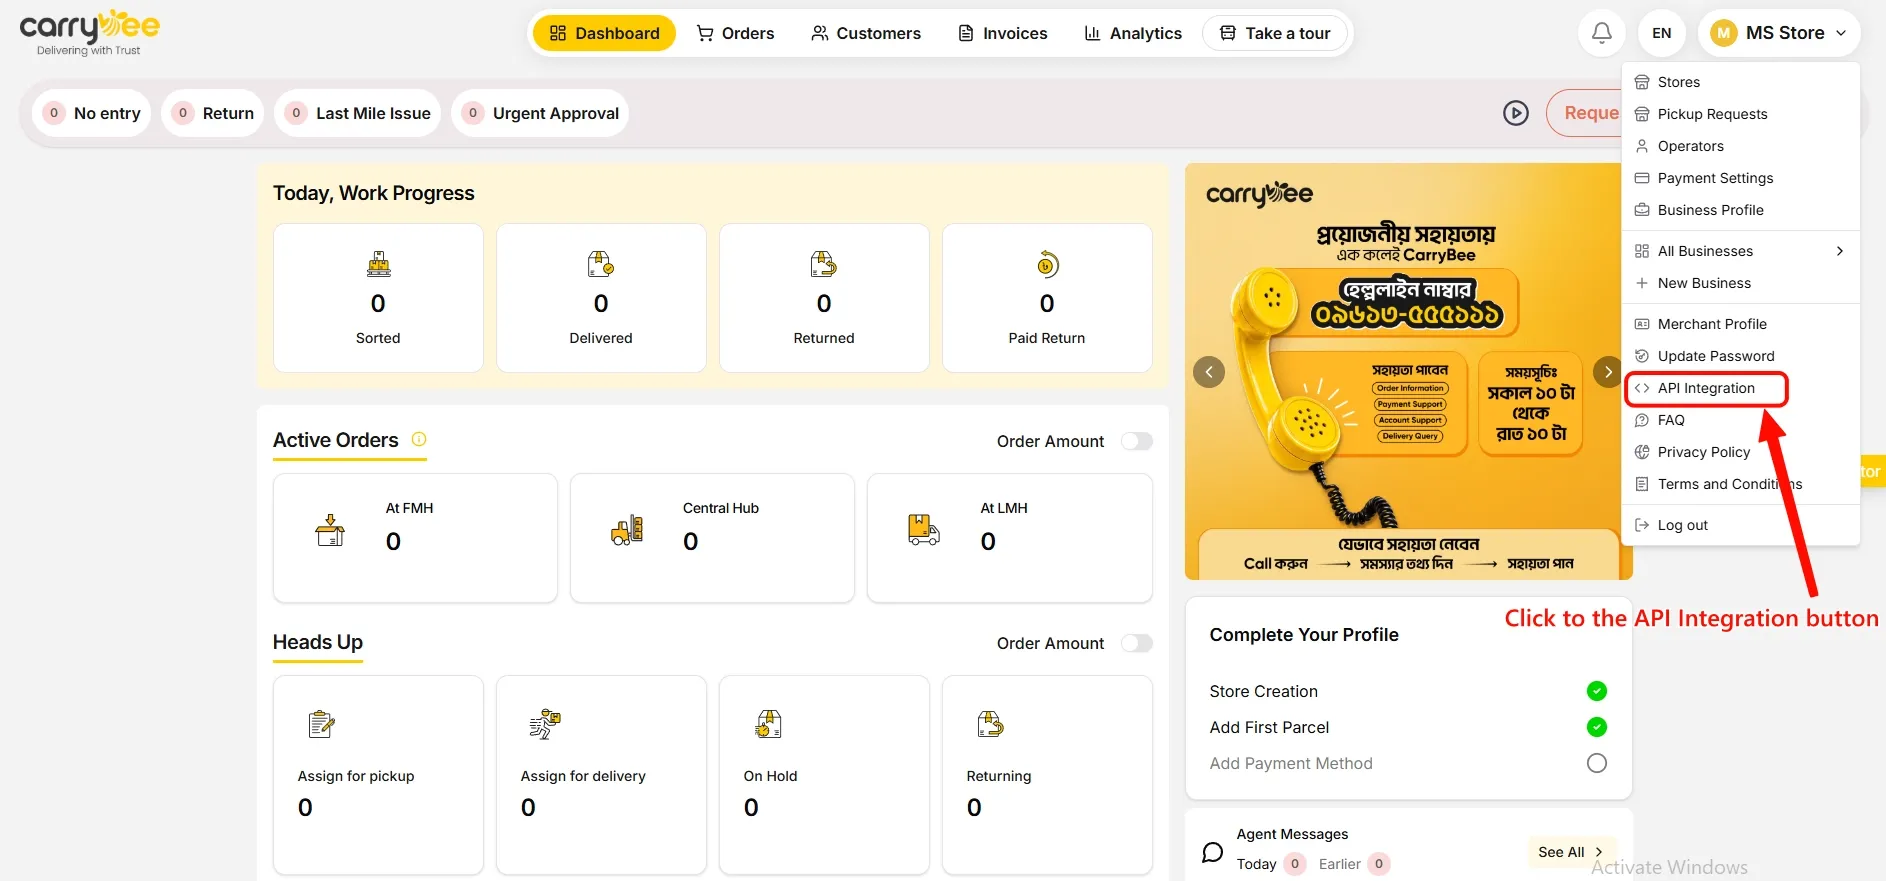
This opens Carrybee’s developer area, with its own menu on the left.
Step 3: In the left menu, click API Credentials.
Step 4: Look at the Production box at the top of the page. It has three values you need. Copy each one with the copy icon on the right of its row:
- Client ID
- Client Secret. It’s hidden as dots, but the copy icon still copies the full value. You can click the eye icon if you want to see it.
- Client Context
You don’t need the Base URL. The app already knows it.
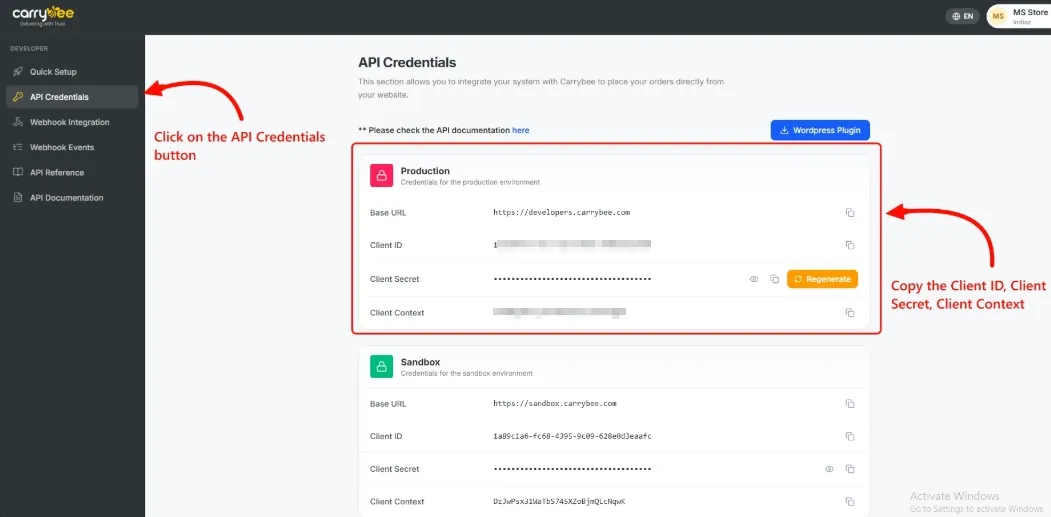
Step 5: Back in the app, paste them into the API Configuration section:
- Paste the Carrybee Client ID into Client ID.
- Paste the Carrybee Client Secret into Client Secret.
- Paste the Carrybee Client Context into Client Context.
All three are required. Since the values look alike, double check that each one went into the right field.
Step 6: Click Save in the bar at the top of the page.
Part 2: Set up the webhook in Carrybee
Section titled “Part 2: Set up the webhook in Carrybee”The webhook is how Carrybee tells the app that a parcel has been picked up, delivered, returned and so on. Without it, the app won’t know when a parcel’s status changes.
You don’t need to create anything here. The app already gives you both values.
Step 1: In the app, go to the Webhook Configuration section on the same Carrybee page. You’ll see two fields:
- Webhook URL
- Webhook Secret
Step 2: In Carrybee’s developer area, click Webhook Integration in the left menu. Scroll down to the Integration Form.
Step 3: Check that the Try Sandbox switch at the top right of the form is turned off. If it’s on, the webhook gets saved for Carrybee’s test environment and your real parcels won’t send any updates.
Step 4: In the app, click Copy next to Webhook URL. Paste it into the Webhook Url field in Carrybee.
Step 5: In the app, click Copy next to Webhook Secret. Paste it into the Webhook Secret field in Carrybee.
Step 6: Under Events, tick All so every status change is sent to the app. If you leave some events unticked, those updates won’t show up on your orders.
Step 7: Click Update Webhook at the bottom of the form.
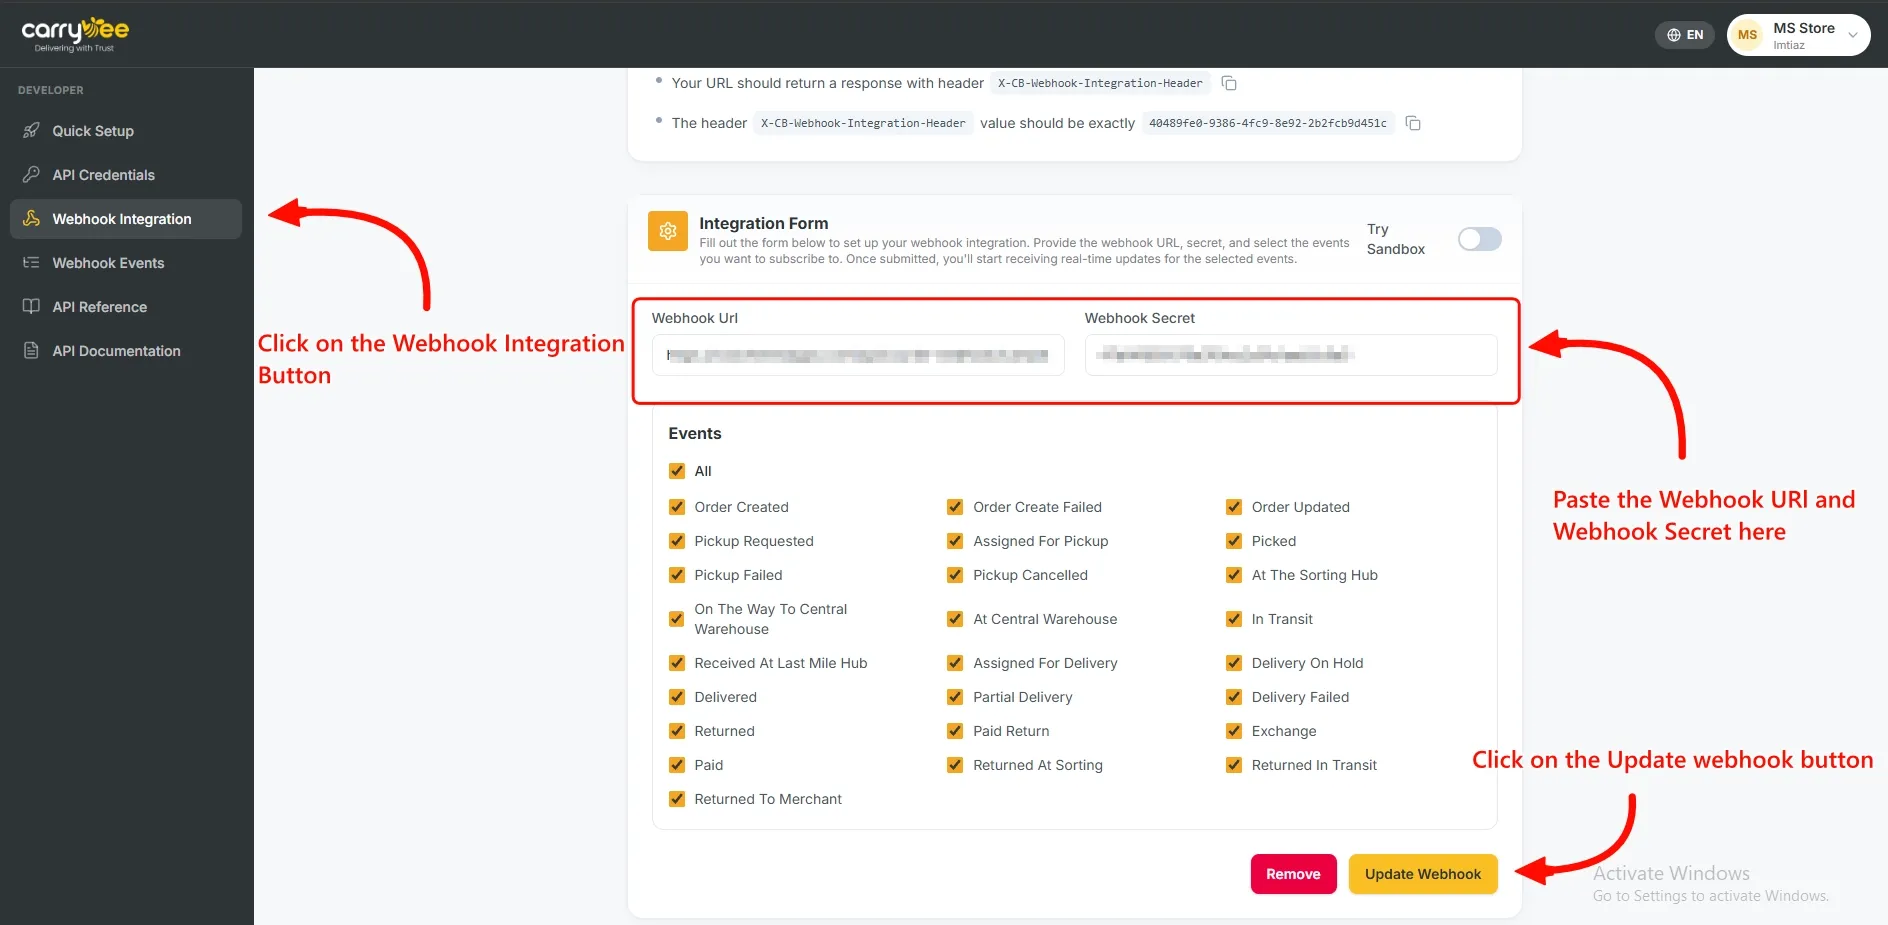
When you save, Carrybee sends a quick test request to the Webhook URL to make sure it’s reachable. The app answers it for you, so you don’t need to do anything with the instructions above the form about status codes and the X-CB-Webhook-Integration-Header header.
That’s it. The next time one of your Carrybee parcels changes status, the update will show up on the order in the app.
If Carrybee won’t save the webhook
Section titled “If Carrybee won’t save the webhook”If Carrybee shows an error when you save, the test request didn’t go through. Usually it’s one of these:
- The values don’t match. Copy the Webhook URL and Webhook Secret from the app again and paste them over what’s in Carrybee. Don’t type them by hand.
- There’s an extra space. Check there’s nothing before or after either value.
- The URL and secret are swapped. The URL starts with
https://. The secret doesn’t.
If it still won’t save, contact us from the Help & Support tab on the Carrybee page in the app and we’ll take a look.
If parcels won’t book
Section titled “If parcels won’t book”If the webhook is fine but the app can’t create parcels on Carrybee, the problem is in Part 1:
- You used Sandbox credentials. Go back to API Credentials and copy the three values from the Production box instead.
- A value is in the wrong field. Client ID, Client Secret, and Client Context look similar, so it’s easy to mix them up. Paste each one again into its own field.
- The Client Secret was regenerated. See the next section.
If you regenerate your Client Secret
Section titled “If you regenerate your Client Secret”Next to the Client Secret on the API Credentials page there’s a Regenerate button. Clicking it creates a new secret and the old one stops working straight away, which means the app can’t book parcels on Carrybee anymore.
Only regenerate it if you think someone else has your secret. If you do, copy the new Client Secret, paste it into Client Secret in the app, and click Save. Your Client ID, Client Context, and webhook don’t change, so you don’t need to touch them.
Common questions
Section titled “Common questions”Is the Webhook Secret the same as my Client Secret? No. The Client Secret comes from Carrybee and goes into the app, so the app can book parcels on your account. The Webhook Secret comes from the app and goes into Carrybee, so the app can tell that an update really came from Carrybee.
Can I untick some events? You can, but we don’t recommend it. Each event is a status update, and any you untick just won’t reach your orders in the app.